Lighting Fun
I decided to play with various lighting techniques to not only practice placing lights in the most optimal setting but to show my current and potential clients that I am versed enough to figure out the best lighting for the goal we’re trying to achieve.
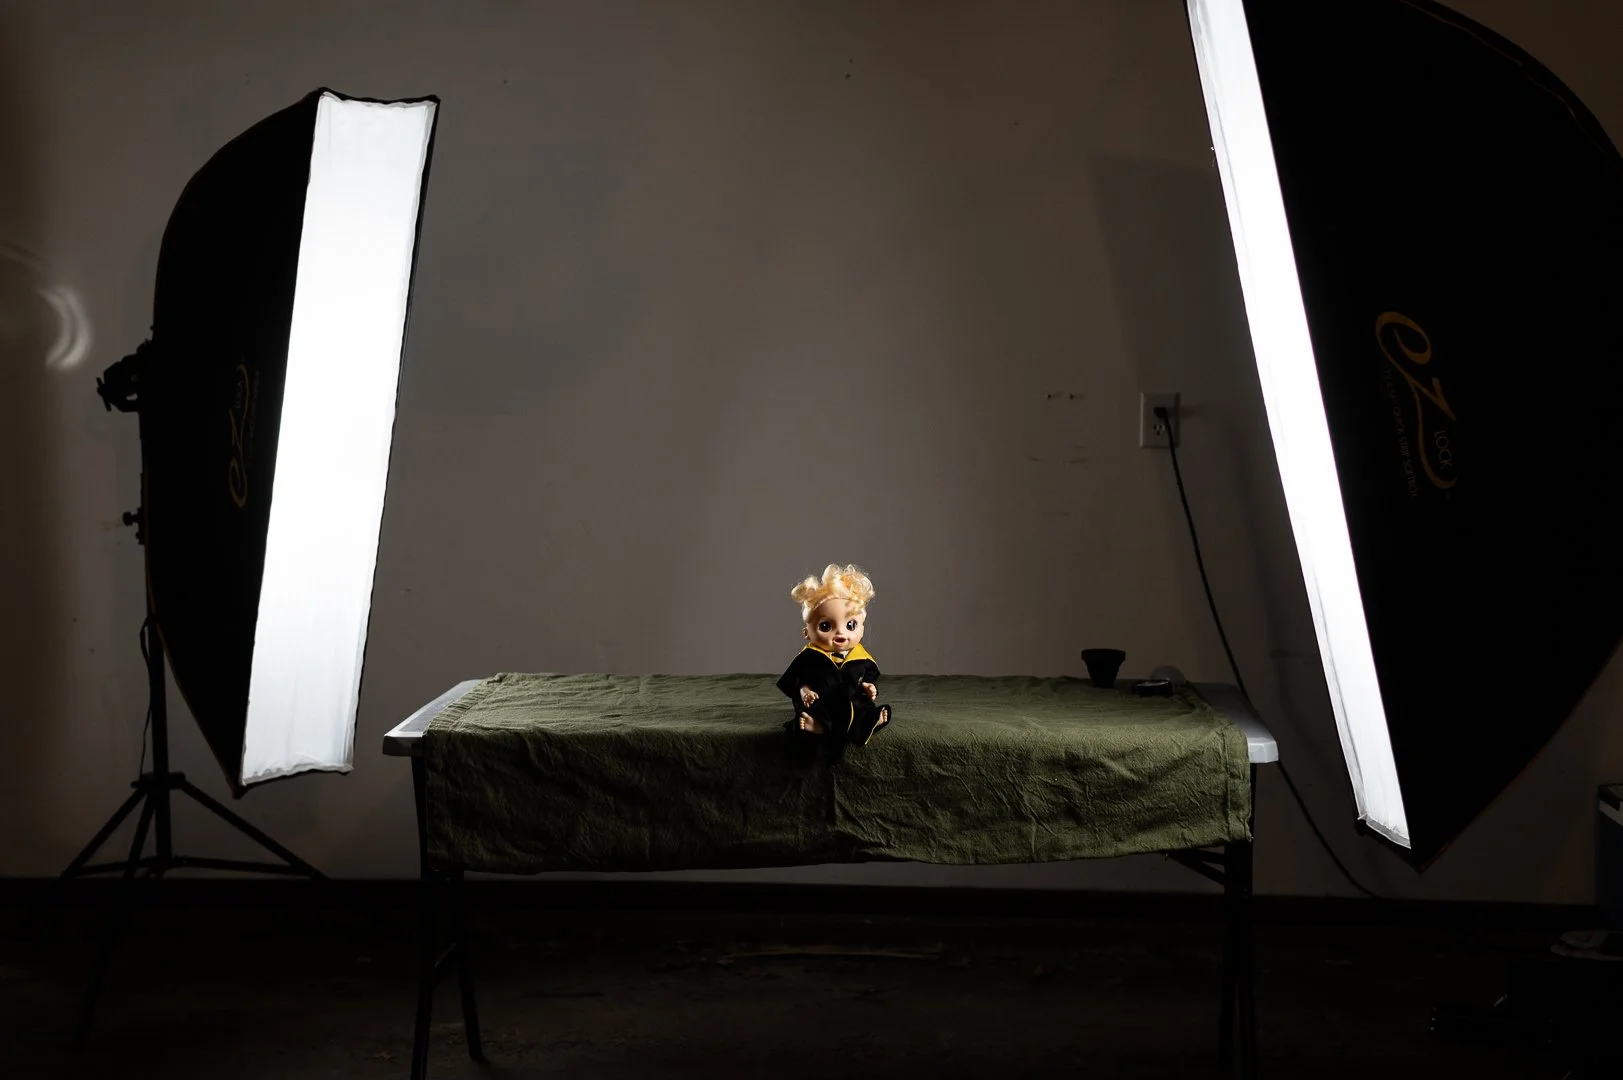
I start by showing you the set-up in my makeshift studio in my garage. You’ll see a blue piece of tape on the floor; this is where I stood to capture the portrait my subject (my daughter’s doll). You’ll see the table where I have my subject sitting, and you’ll get to see just the general location of the garage and what it looks like. Before each final photo I’ve tried to show the light set-up and what modifiers I’m using, if any. I’ve put a description on the images if it’s not apparent what modifiers I’m using to get the different effects. Then, there are 2 images of my subject; a “RAW” (or unedited) image and a final product. So, not only am I showing the various lighting I’m using, but what may be seen on the back of my camera immediately after, compared to the editing I apply to get the final image. But, I will only focus on explaining the lighting set-ups in this blog. Maybe a more in-depth on how I edit could be a future blog!
So, without further ramblings from me, let’s talk about the lighting I used.


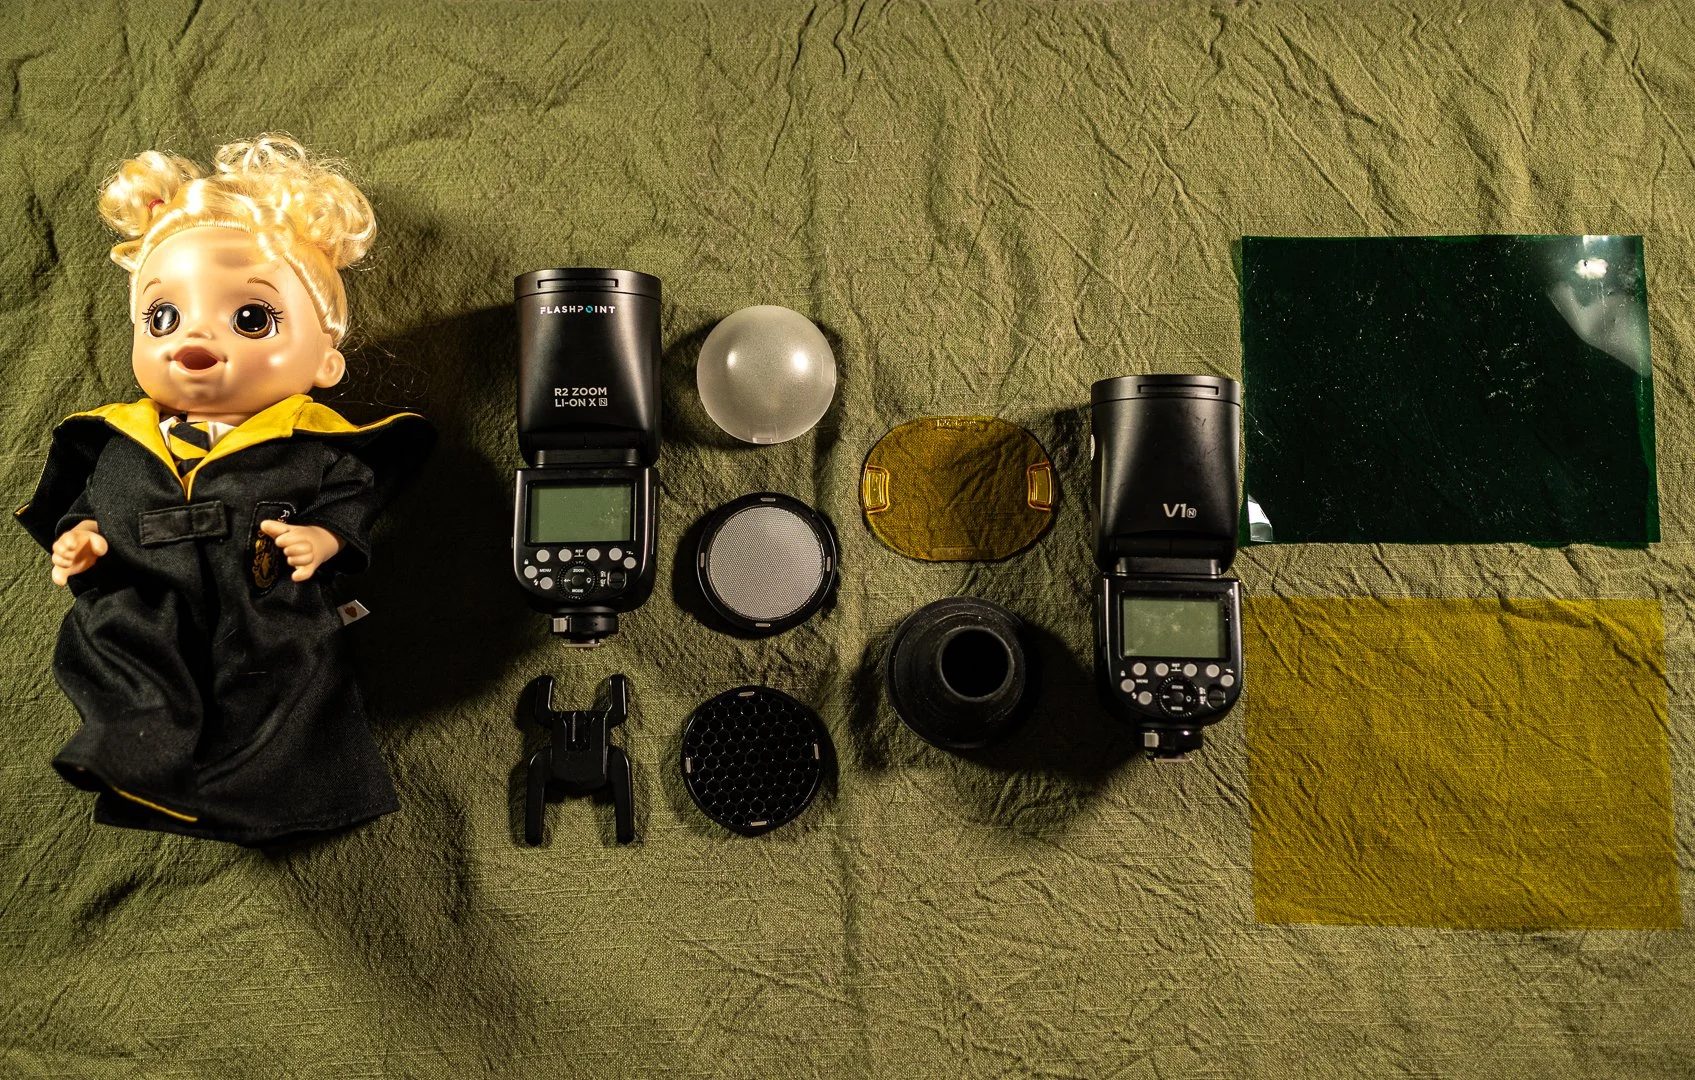


First, the set-up of the makeshift studio in my garage. Above, you can see on the left of the overview image where the blue masking tape is on the ground, which is where I stood to capture the image of the subject every time. My daughter still asks me why I put it there every time she sees it on the floor (yes, it’s still there as of the published date of this blog). There are also a few images of the gear I used for this lighting experiment.
As of late I tend to carry both of my speedlights (Godox and Flashpoint flashes in the images above) on almost any job I go to. There’s so much you can do with 2 speedlight flashes; from getting creative to simply lighting a subject better. During more involved sessions I may bring my 2 constant lights (Neewer lights with black folding barn doors in above images) to add color or a little extra light to the scene. But they’re more equipment I have to carry so it really depends on the type and location of the session I’m working on.
You will also see a few modifiers for my speedlight flashes in the photo of items on the table. The bulbous one is just a diffuser, the flat textured one below that is a different kind of diffuser (I’m not expert enough to tell you the different effects they cause, but they both diffuse the light and I use them both a different times), and the one below that that has honeycomb shapes is yet another diffuser that makes the light go to a more focused area rather than spread out. These are all magnetized modifiers so I just put them right on top of my speedlight and they stay right on there!
The yellow oval-like object beside those is a “gel,” or a piece of colored plastic that I can put on the flash to change the color of the light it emits. I LOVE playing with gels and adding color to my images. And the piece below that is a “snoot” I believe. It concentrates the light into a circular (ish) shape. I like adding this as an element to backgrounds, especially during headshots styled photos. The green and yellow rectangles all the way to the right in the image of the items on the table are also gels but they are for my constant (Neewer) lights.
Onto the first light set-up!


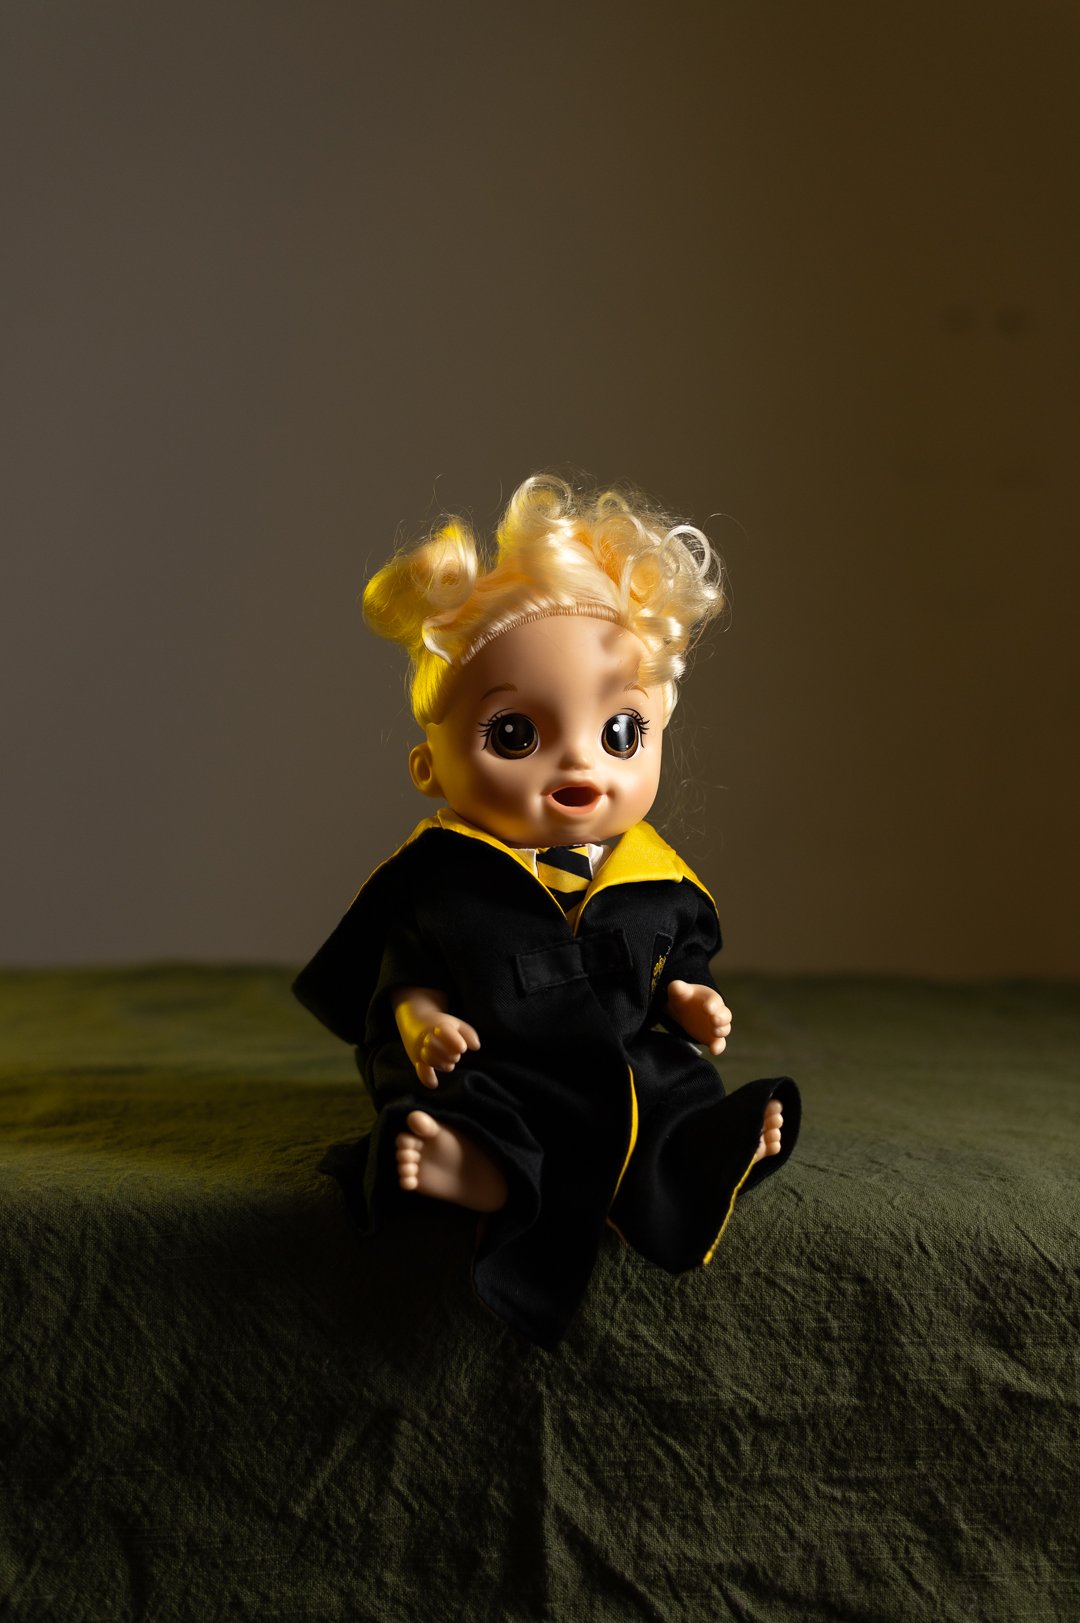
I wanted to set up a basic and simple light configuration for the first set of images. I put the 2 speedlight flashes inside the strip box modifiers and set the boxes at about a 45 degree angle away from the subject. Turning the lights/modifiers mostly away from a subject is called “feathering.” From what I’ve experienced it' allows a nice, soft light to reach the subject without overexposing them (and a term and learned at my first year at Shutterfest!). I believe that in this set up the light on the left of the image was a bit brighter than the one on the right, which wasn’t my original plan but alas, it happened.
So, from this light set-up into the first, unedited image, you can see that there is a light on the subject’s face from the right, but the light on the left is brighter for sure. If I redid this I would probably switch that around though.
Then look at the edited version of the portrait. I’ve brightened everything up a bit overall, but didn’t make many other changes besides that. I wanted to keep this set up simple and basic to show where I may start in sessions.


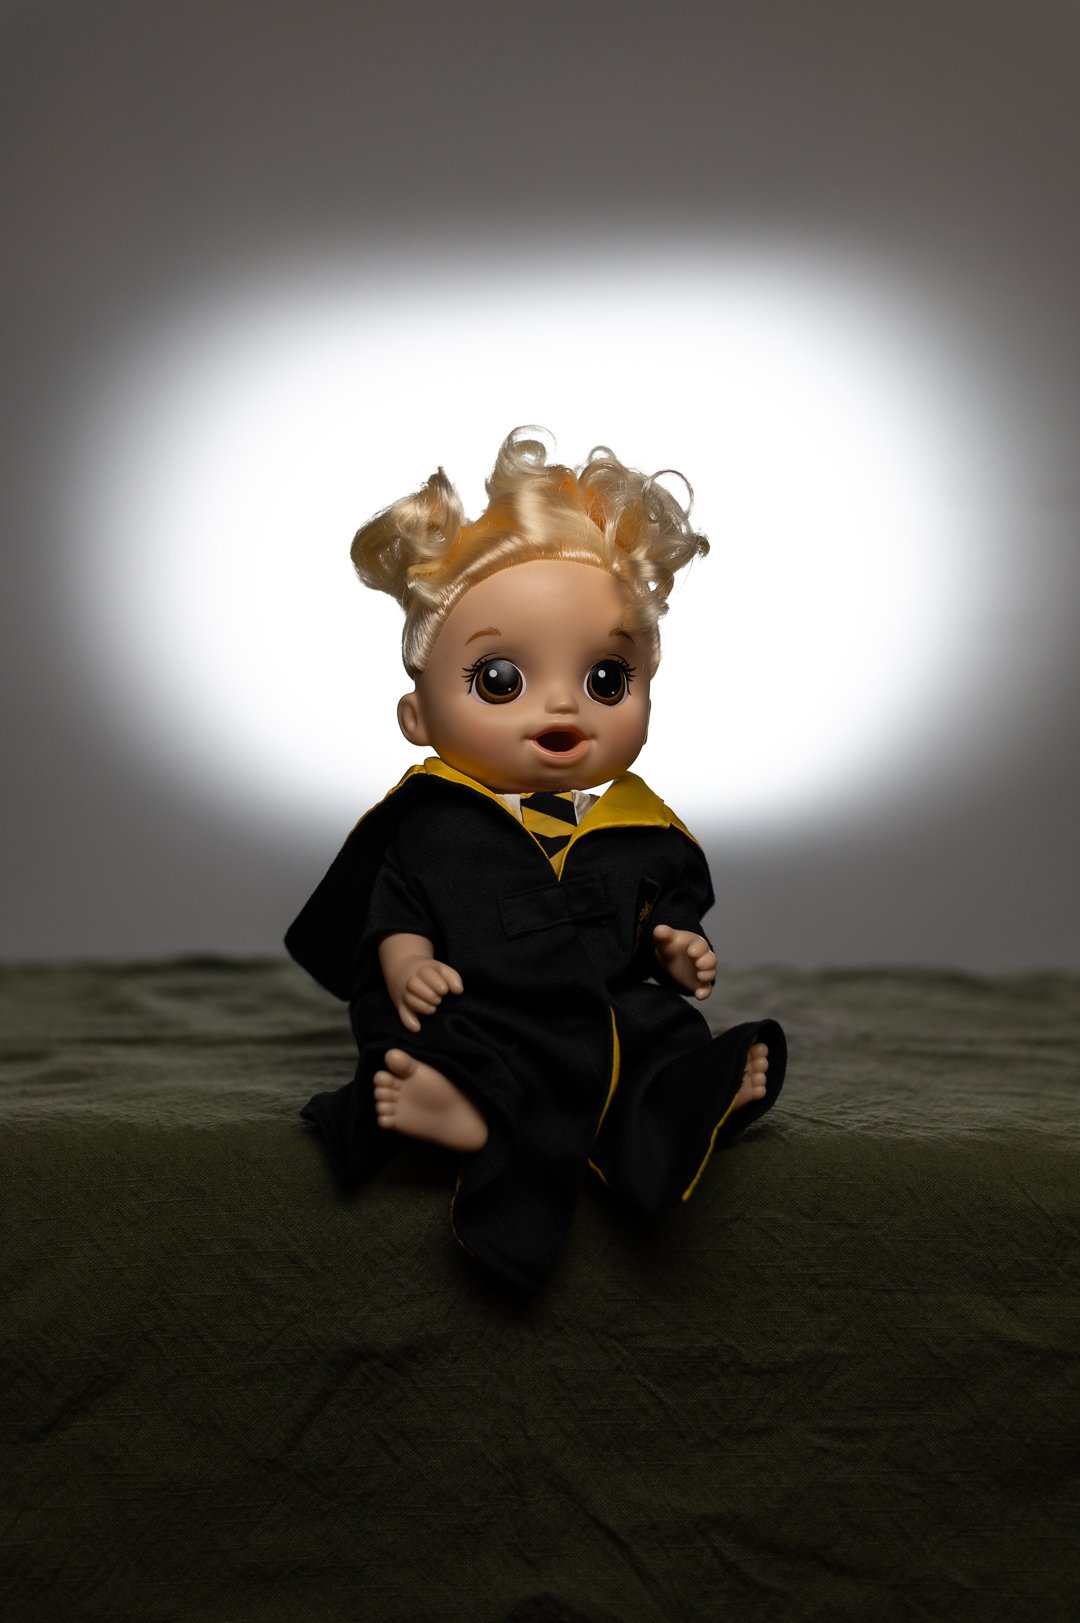
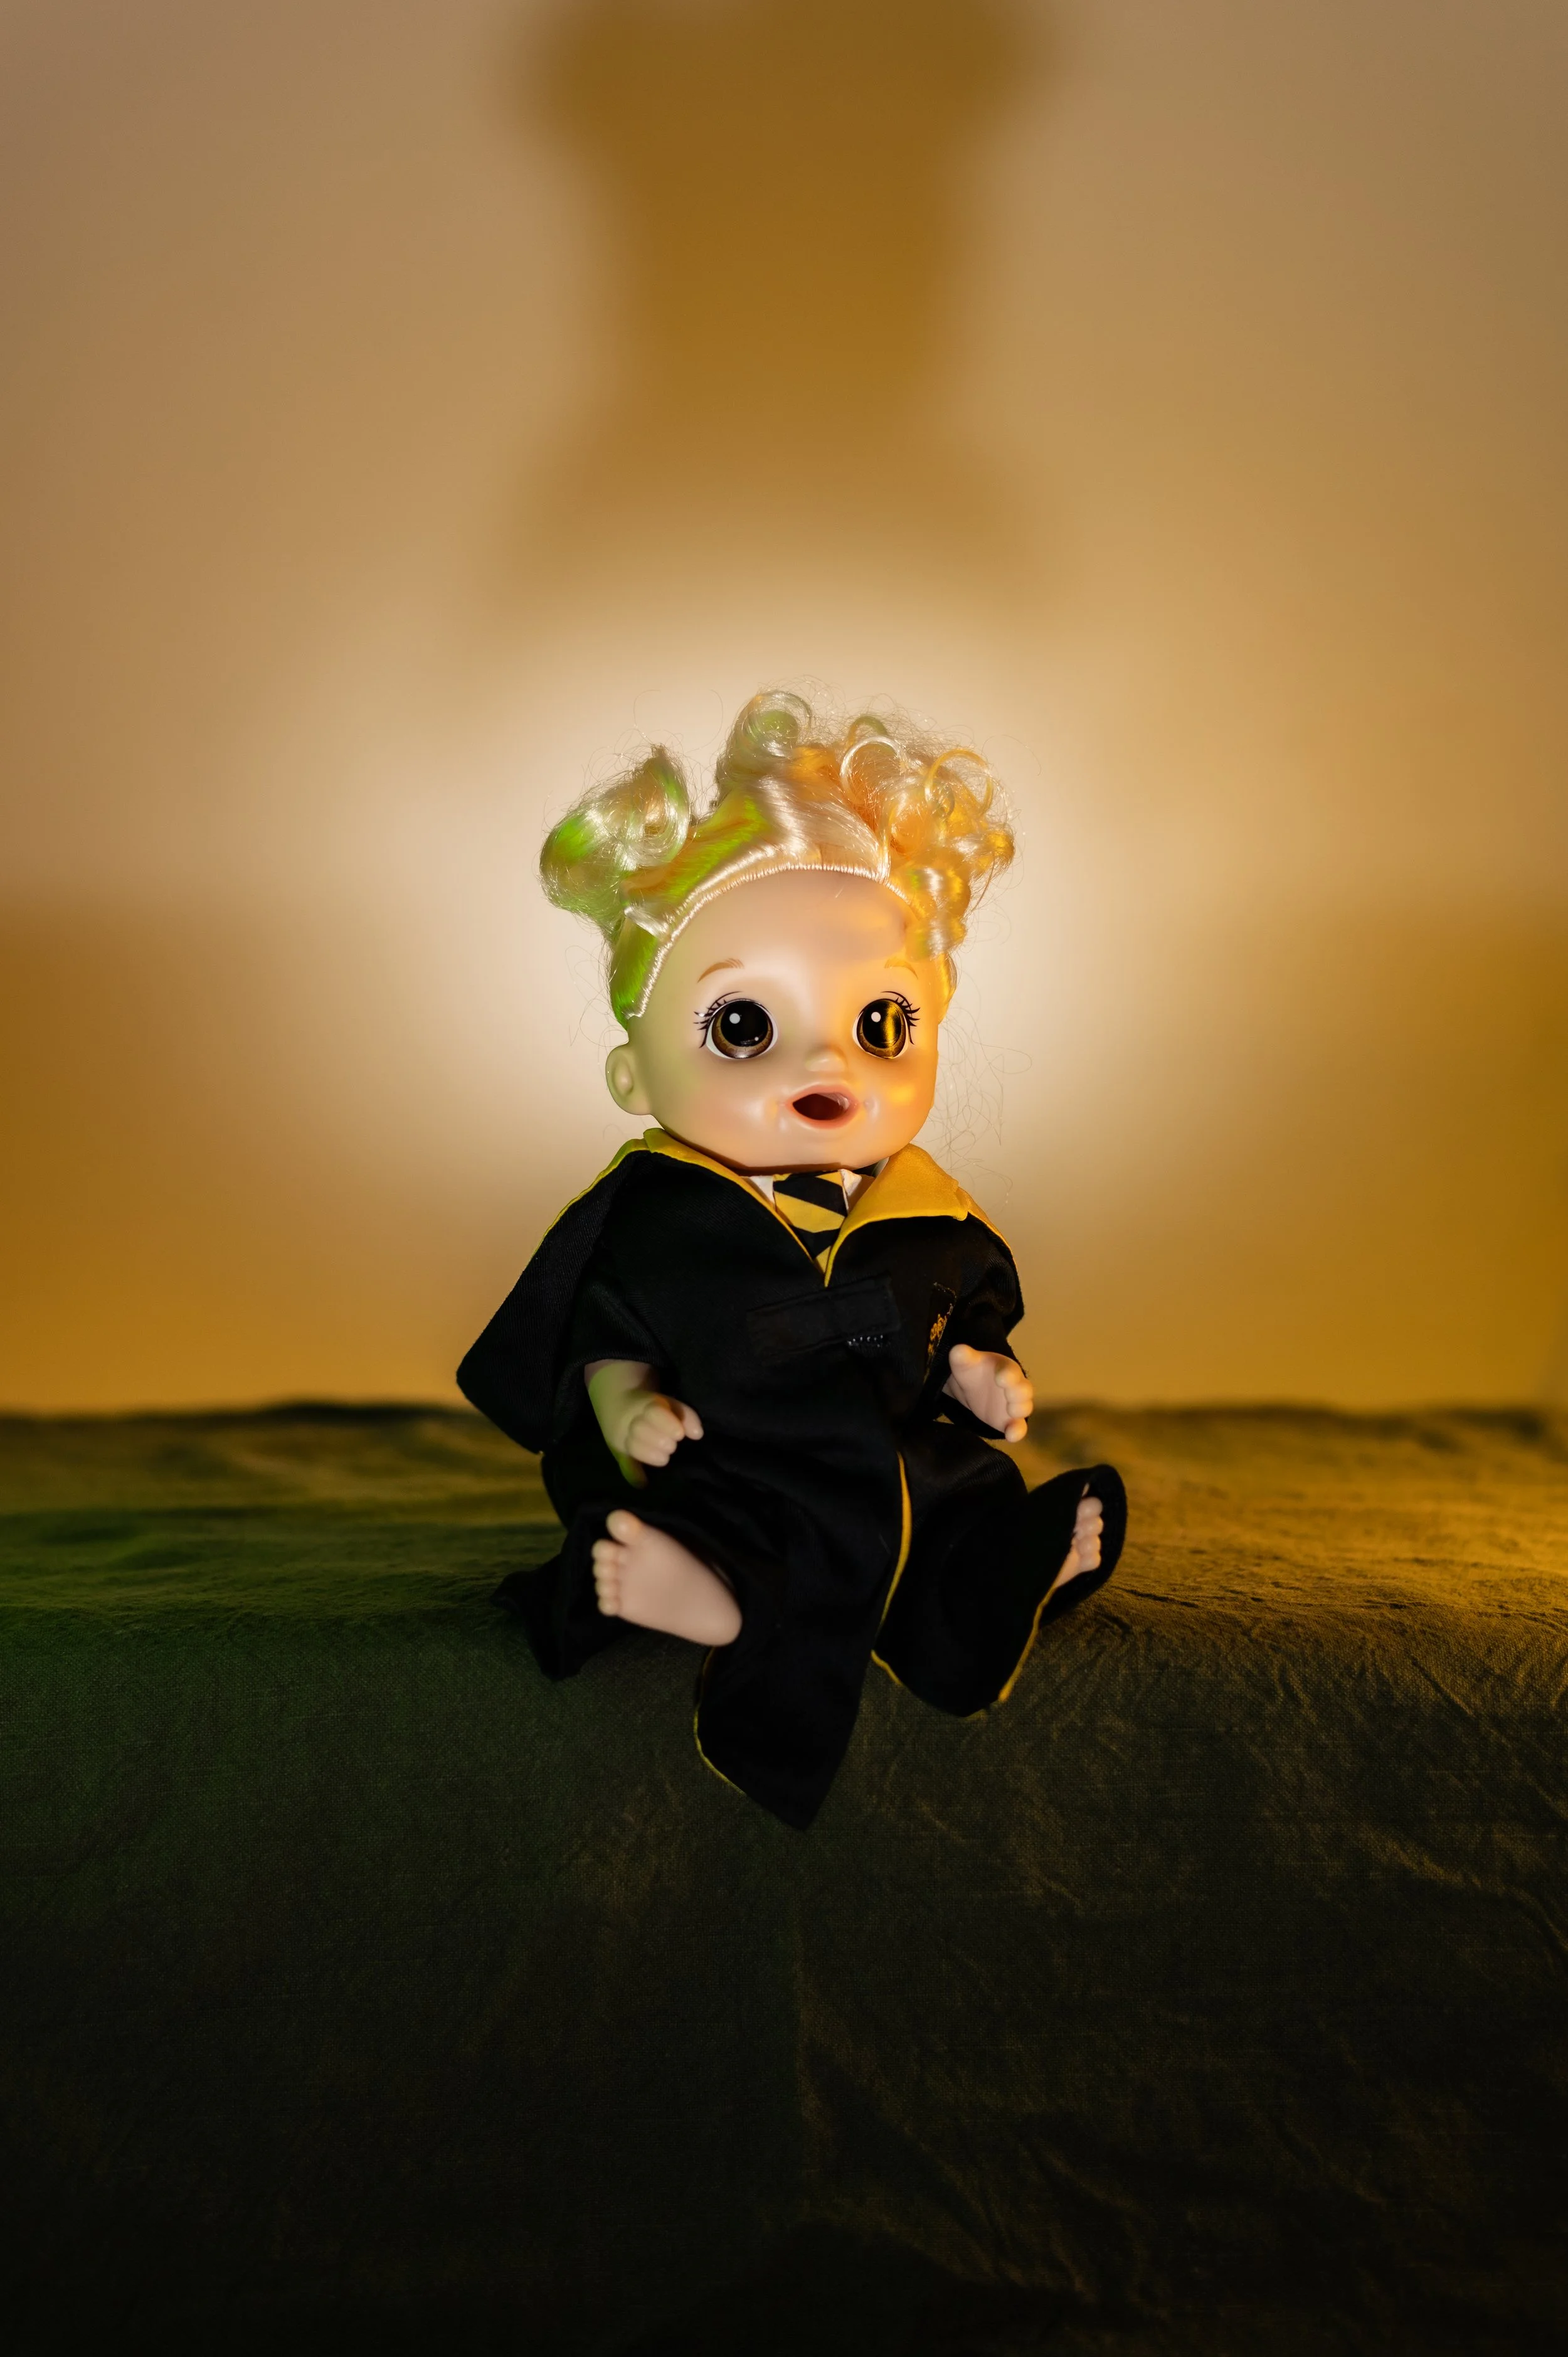
With the second set-up I wanted to add a flare behind the subject. In this case, since it’s a doll, it really lit up her face/head area. Since it’s literally an empty-headed doll the light was shining right through it. In a real human the light shouldn’t shine right through the head and the goal would be to add a backlight to the subject to define the subject more.
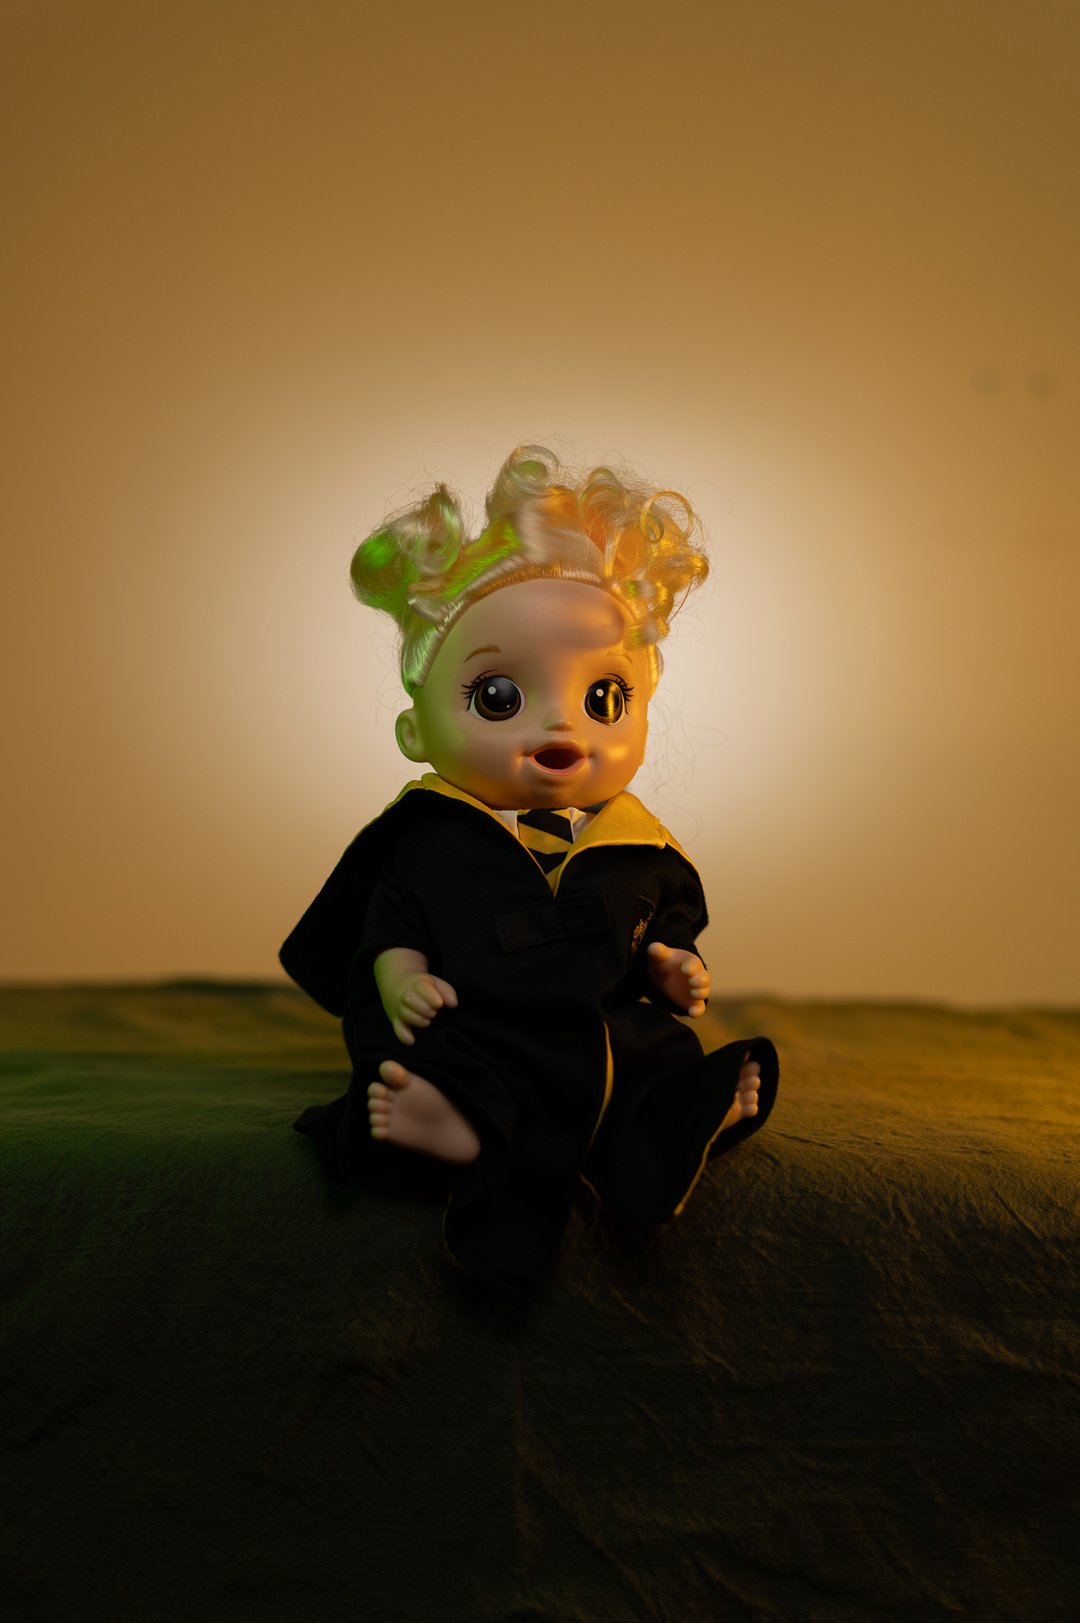
There are two sets of images this time: one with the white, unfiltered flash and one with a yellow gel added to it. The first set of images had the flash pointed toward the subject with no diffusers or other modifiers involved. I wanted to add a light back there to define the subject so they didn’t blend into the background. It looks like the flash behind the subject was brighter than the flash to the right because the subject’s face isn’t as well lit as I feel it should be. In editing I did brighten it up, but the light that’s shining into the subject’s head (literally) seems to be overpowering the light to the right.
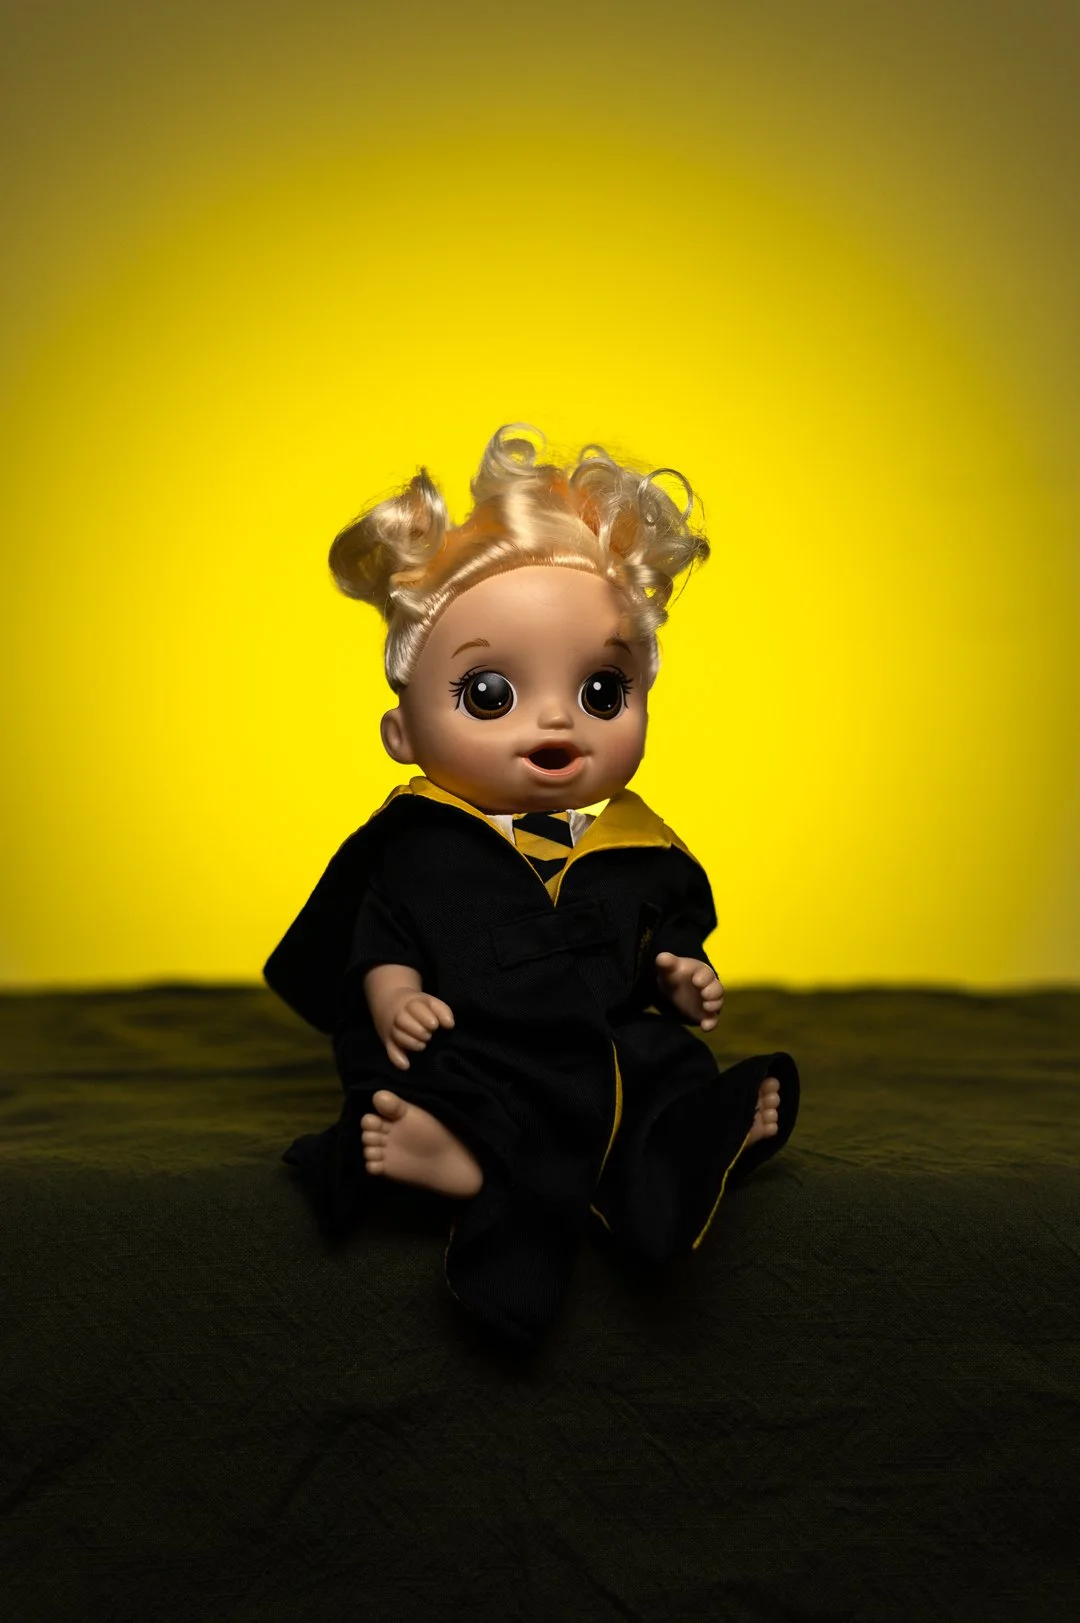
In the second set of images I just added a yellow gel (or a little plastic piece that goes over my flash) to add some color. I think the subject’s face is a little better lit and that could be one of two things happening. I think it’s either: a) the yellow gel diffused the light a bit so it wasn’t quite as bright, OR b) I decreased the power of the flash behind the subject or increased the power of the flash to the right of the subject (it’s been a bit since I took these and when I’m writing this post). But some sort of adjustment was made and I was a bit happier with the outcome.
Overall this was not my favorite light set-up since it didn’t flatter my subject well. It enhanced that it’s an empty-headed doll and that was NOT my goal. So, onto the next set-up!


With light set-up #3, I simply turned the flash that was behind the subject in set-up #2. Now, instead of the flash facing the subject’s back it is now facing the background/wall. This has added a slight spotlight effect on the background. Going through the 5 sets of images above, I just added different modifiers to the flash facing the wall to get different effects. Let me break them down.
The first set of portraits shows a very dark image as the unedited version, and a somewhat brighter version as the edit. I’m not sure if the flash to the right didn’t go off or if it was such a low power that it didn’t outshine the flash facing the background. The edit now has a brighter subject but it doesn’t have a good “shine” to it yet.
So, the next set of images is the same set up, but with two modifiers over the flash facing the background. I added two flat magnetic modifiers to the top of the flash; the honeycomb and the textured flat clear one. This diffused the light a bit so it wasn’t quite so bright on the background. You can also see that the subject is lit much better this time! Even comparing the unedited vs. edited versions the subject is well lit and the whole of the image seems to be well exposed.
The third set of images is similar to the second set; well lit subject and the image overall is well exposed. However, instead of the two modifiers on the flash I added a snoot (an attachment that bends the light into a shape, (in this case a more oval look), usually a circular shape. This creates a more dramatic spotlight effect and I like to use it to halo a subject’s head usually.
The last 2 sets of images have a yellow gel added to the flash facing the background. The fourth set has no modifiers and the fifth set has the honeycomb and flat, clear, textured modifiers as well as the yellow gel. You may not notice much difference, except maybe a bit brighter overall, but the image was very good even straight out of the camera; not much editing was needed.


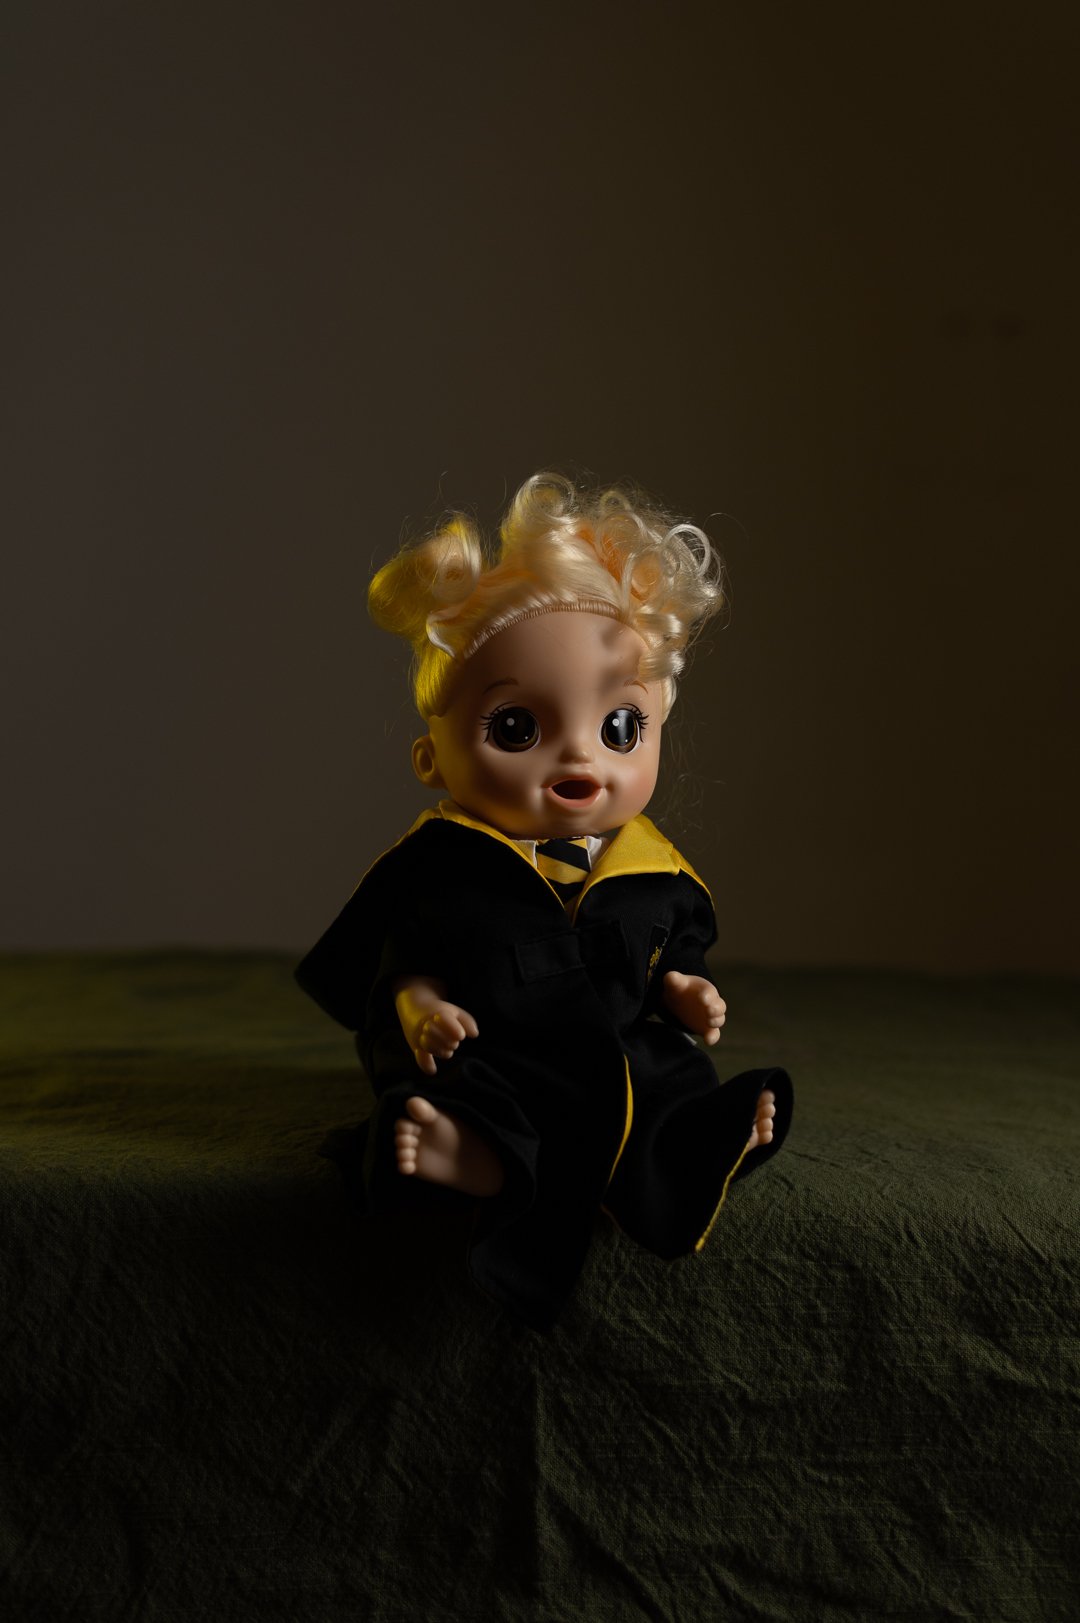
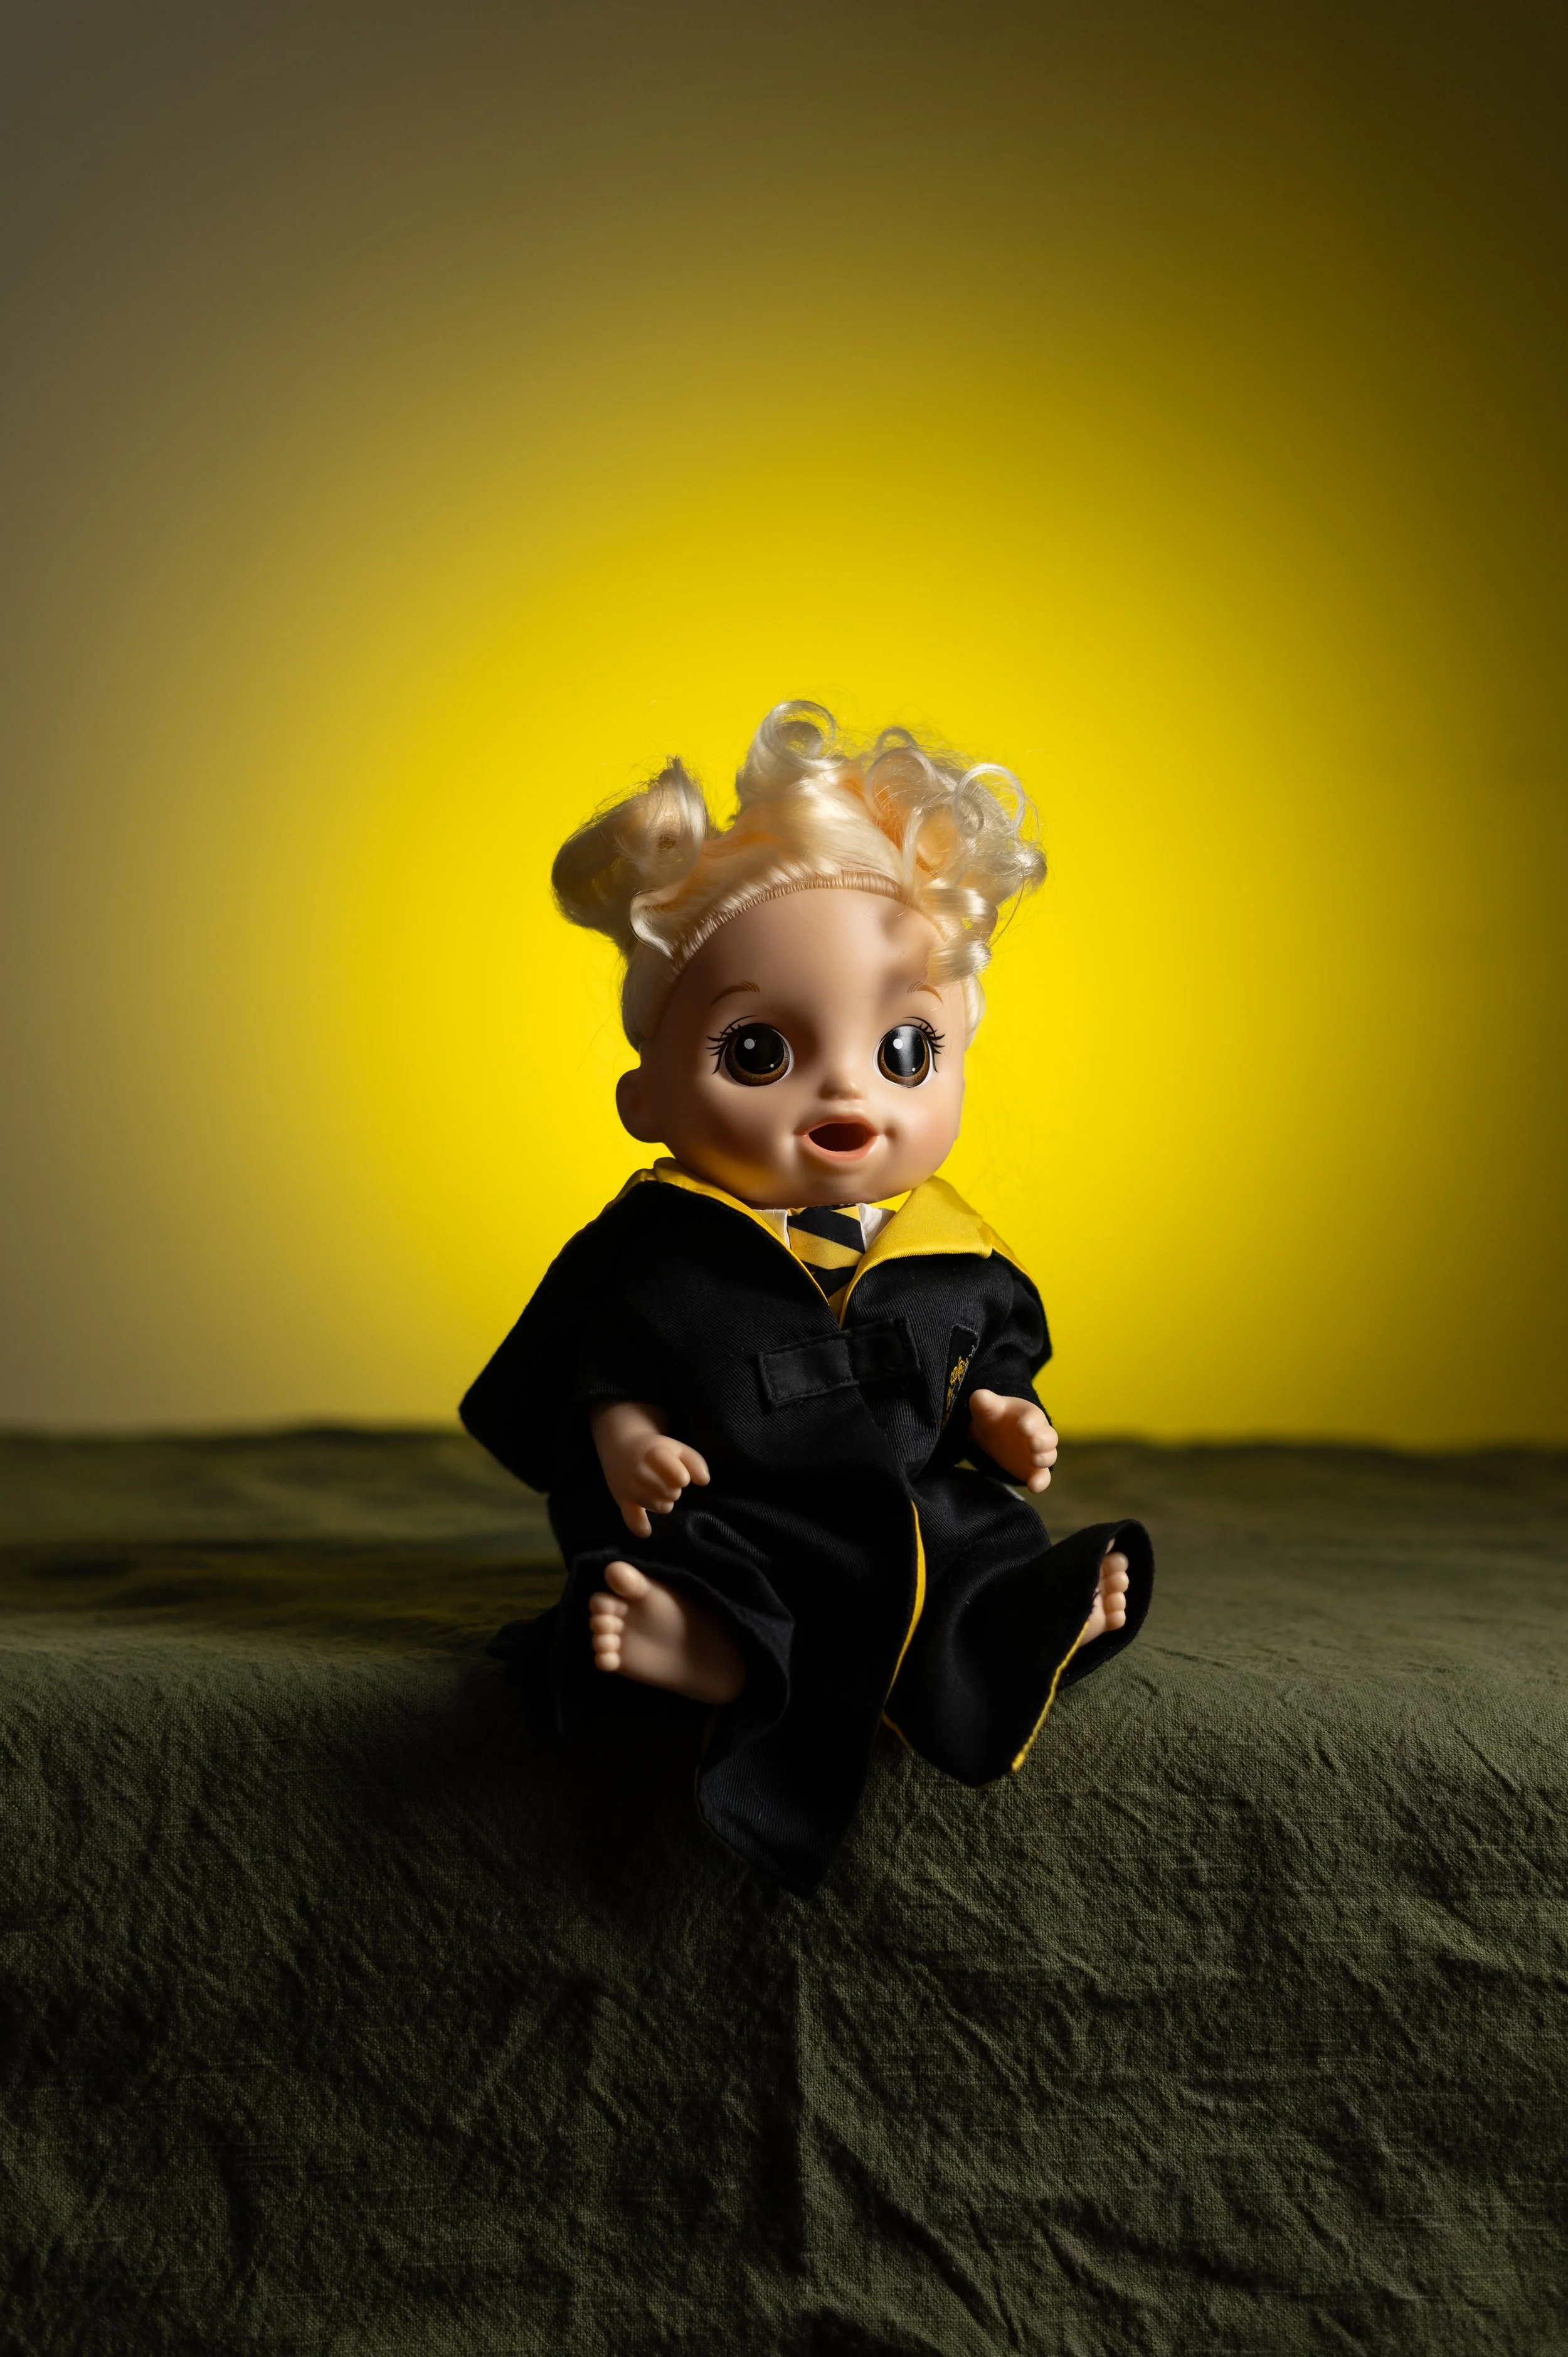
Here I went back to a well lit image that would make for a good, regular headshot. The light on the right/in front of the subject is lighting the face well and the one on the left/behind the subject is ensuring that the subject doesn’t blend into the background by highlighting the shoulder area. By giving that highlight on the shoulder/side of head area I feel like it defines the subject and makes them “pop” a bit more in an image.
In the first set of images I only used the strip box modifiers with the flash placed on a mount inside them. But with the second set of images I added a yellow gel to the flash on the left of the image/behind the subject to add a bit of color. When you look at the hair on the left side of the subjects head you can see the yellow coloring. It also spreads to the background and table a bit as well, adding a nice little color difference in there.


For set-up five I went to a little different, maybe a bit more dramatic, effect. I still wanted the face lit evenly but from a different angle to maybe give a different feel to the images. I moved the light above the subject and turned the rectangle strip box to the side, aiming to add more shadows under the subjects face (which can also help alleviate the look of a “double chin” of a client is sensitive of that area). With this lighting it could be made to be a more “harsh,” or more direct light onto the subject to give a more dramatic and possibly eerie effect. Or by having the subject tilt their head up or down for an even more dramatic effect would work too!
The first set of images had the one strip box light facing the subject and one speedlight facing the wall to brighten the background. In the second set of images I only added a snoot to the speedlight facing the wall to concentrate the light into the circle/oval shape that I’ve used in the previous setups. In the third set of images I then removed the snoot to replace it with the set of two diffusers (the clear textured one and the honeycomb one); setting up the background to be a less bright version of the first set of images.
In the last 2 sets of images here I applied a yellow gel to the speedlight facing the background to transform it to something seemingly completely different (as I have in the other light set-ups too). I like using this tactic to change the look or feel of a background. It’s such an easy way to change the look of an entire image. And, in these last two sets of images as well as the previous light set-ups, I captured one photo with no filters on the flash facing the wall, and on the next one I added the two diffusers (honeycomb and clear, textured).
In editing all of these images there wasn’t a lot of adjustments made, just brightening the subject really. There was some removing of inconsistencies in the background (marks on the garage wall), but other than that I didn’t feel like a lot needed done to these images!


I love adding color to images in various ways, love it. So, I added in two constant lights. Those are just lights that continuously stay on, no flashing involved. I think some people may refer to them as video lights maybe? Anyway, I added those each with a gel (or a way to change the color of the light) to them; one with green and one with yellow. I left the main speedlight flash above the subject facing it at about a 45 degree downward angle. The second speedlight flash I placed behind the subject to add various light effects to the background.
In the first set of images above I had no filter on the flash facing the wall so it is quite bright. The main difference in the unedited vs the edited is that the final (edited) version is brighter and may have some marks on the background removed. In the second set of images I applied the two diffuser filters (the honeycomb and the clear, textured) to the speedlight facing the wall to make it a bit less bright and white. In the third set of images I turned around that same speedlight so it was then facing the subject instead of the background. When you place a flash behind and facing a subject it highlights their entire outline (stray hairs, figure, etc.), which can give a dramatic effect sometimes! Again, the main differences between the unedited and edited is primarily brightness. In the fourth set of images here I turned the flash back around to face the background and placed a snoot on it again, which created the circular shape on the wall. I like doing this to highlight a subject’s head area by using the background. And, still, the main difference in the edited vs unedited is that the final (edited) version is brighter and may have some marks from the background removed.
Sometimes adding in that extra bit of light for a “pop” of color can go a long way! Finding how to balance the new addition of lights with the flashes was a small challenge, but I’m claiming success in this scenario. You can see the yellow and green constant lights in the subjects face and hair, while still getting a good, balanced light from the flash above the subject, and the different background variations from the flash behind the subject!


In the seventh, and final, light set-up, I moved the main speedlight down below the subject’s face/eyeline to give a “creepy” effect to the image. In the first set of images you may notice there’s not a lot of weird looking things in the image. I believe this was due to the light not being far enough below the subject to give that effect. So, overall this was less flattering than the light being over the subject, but could still turn out to be a fine enough image. Moving to the next set of images, #2, there is a VERY different effect. The light is coming from further below the subject and gives those shadows on the face above the cheekbones which isn’t typical. This gives more of the flashlight-under-the-face look, which most of us probably associate with “creepy.” With this set-up I really like the shadow on the wall that the flash makes with the subject. This could be very fun to play around with! (Check out my shadows with a medusa character in this gallery!: https://storyphotographybyselena.pic-time.com/-bellmansioncontentday/gallery)
In the third set of images I lowered the light even more so the shadows on the face are more pronounced, not what you would typically see in a normal portrait of someone because it’s just not usually flattering. This type of lighting will likely be used in specific scenarios where a “creepy” effect may be wanted or sought out.
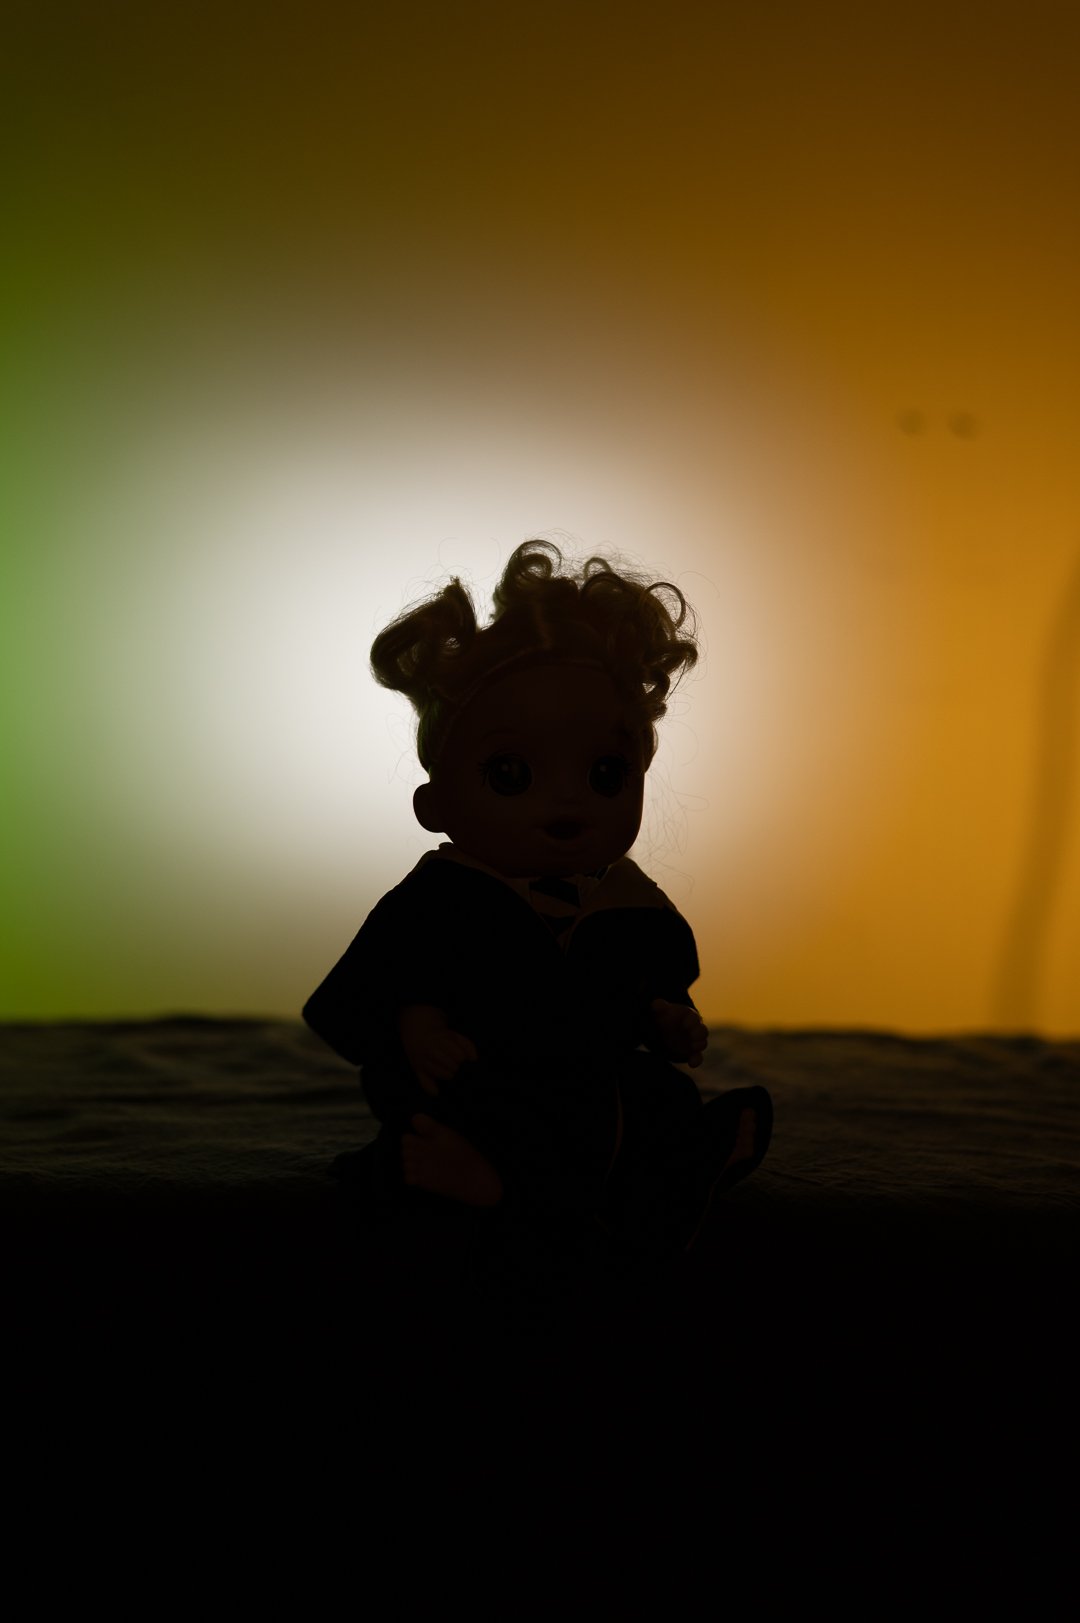
The next few couple of images are much darker because I turned off the main speedlight flash facing the subject. I wanted to create a silhouette of the subject instead of focusing on the whole of it. In the first set of these two sets (set #4), I saw that the subject’s hair didn’t seem very flattering and just the way they were facing wasn’t very flattering or enticing for a silhouette image. So, you’ll see that in the second set of silhouette images (set #5) I turned the subject slightly to give more detail about them and so you couldn’t see the very deep V part in their hair (that they’re very self-conscious about). During these silhouettes I still had the second speedlight flash facing the background to give the effect of a halo light outlining the subject. You may also notice that the constant lights show up MUCH more prominently now that the main flash facing the subject was turned off. My flashes are more powerful than the constant lights so it dulls out the colors of them. So when I took it down to just one flash facing the wall the constant light gel colors get their time to shine! In the edited version I just brightened everything up a bit and maybe sharpened up the image a tad as well, but that’s about it.
If you compare before and after images throughout this post you’ll see no major color changing was done, except make the colors more bold and bright. This goes for most of my work in the field too; I try to stay as true to color as possible. Sometimes certain lights can cast more orange or yellow looks to skin or the environment so I try to correct that, but not much other than that.
That wraps up this blog post! I hope you enjoyed learning a little about my thoughts and processes with lighting and a bit about my editing process too. I plan to cover some more technical aspects of photography in the future so if you enjoyed this one watch for others coming later!
Thank you for reading!